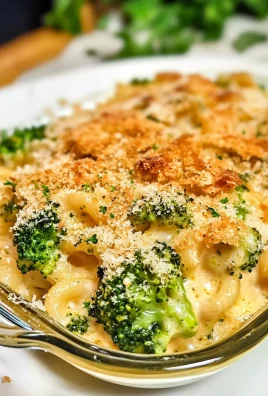
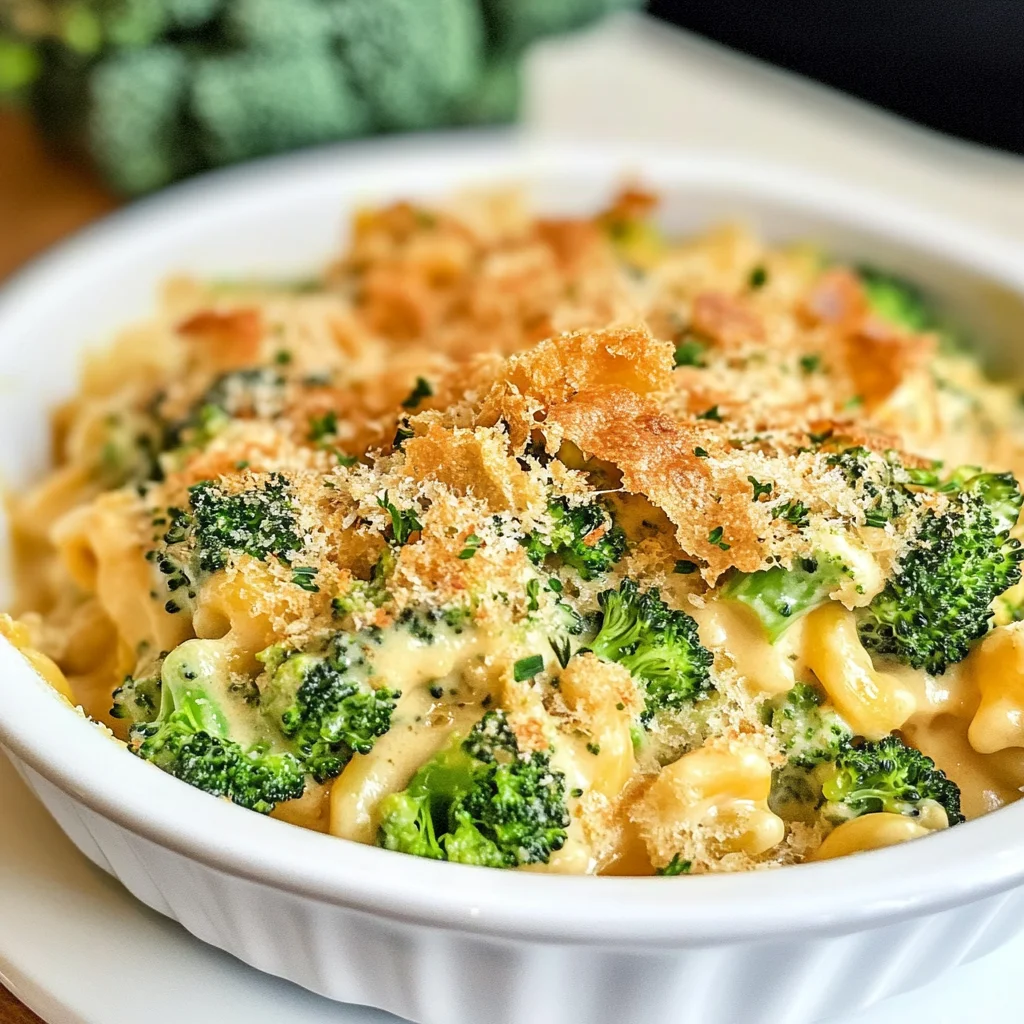
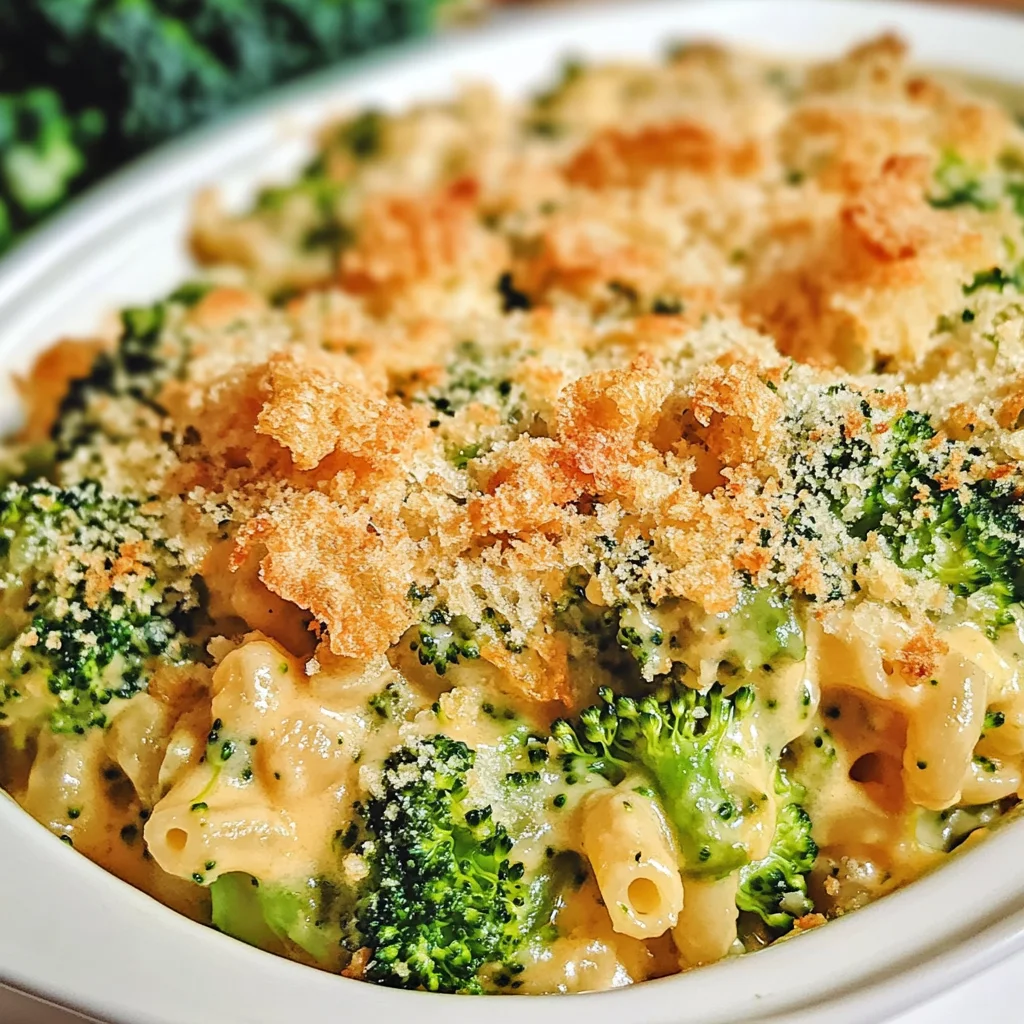
If you’re looking for a cozy, comforting dish that won’t derail your healthy eating goals, then this Keto Broccoli Mac and Cheese is just what you need! It’s a creamy, dreamy alternative to traditional mac and cheese, packed with vibrant broccoli florets that not only add color but also a nutritious boost. Whether it’s a busy weeknight dinner or a family gathering, this dish is sure to please everyone at the table.
What makes this recipe extra special is how easy it is to whip up. With simple ingredients and straightforward steps, you’ll have a delicious meal ready in no time. Plus, it’s gluten-free and melts in your mouth—perfect for those who love cheesy goodness without the guilt!
Why You’ll Love This Recipe
- Quick and Easy: With just 15 minutes of prep time, you can have this dish ready in under an hour!
- Family-Friendly: Kids will love the cheesy flavor while parents appreciate the hidden veggies.
- Make-Ahead Convenience: Easily prepare it ahead of time, so you can enjoy stress-free meals during the week.
- Rich Flavor: Creamy cheeses combined with fresh broccoli make every bite delightful.
- Keto-Friendly: Enjoy all the comfort of mac and cheese without the carbs—perfect for your low-carb lifestyle!
Ingredients You’ll Need
Preparing this Keto Broccoli Mac and Cheese is a cinch with these simple and wholesome ingredients. They come together to create a dish that’s not only delicious but also nourishing for the whole family.
For the Cheese Sauce
- 4 cups Broccoli Florets
- 2 tbsp Butter
- 1/2 Onion (Chopped)
- 2 tsp Minced Garlic
- 4 ounces Cream Cheese (softened)
- 1/2 cup Heavy Whipping Cream
- 1 cup Shredded Cheddar Cheese
- 1/2 cup Shredded Colby Jack Cheese
For the Topping
- 1/3 cup Beef Rind Crumbs
- 1/4 cup Parmesan Cheese (shredded)
Variations
This Keto Broccoli Mac and Cheese recipe is wonderfully flexible! You can easily customize it to suit your taste preferences or dietary needs.
- Add More Veggies: Toss in some chopped spinach or bell peppers for extra nutrition.
- Make It Spicy: Add some red pepper flakes or jalapeños to give your mac and cheese a kick!
- Swap the Protein: Mix in cooked chicken or turkey for an added protein boost.
- Vegan Option: Use plant-based cream cheese and dairy-free cheese alternatives for a vegan-friendly version.
How to Make Keto Broccoli Mac and Cheese
Step 1: Prepare the Broccoli
Start by adding the broccoli to a pot of boiling water. Blanching it until just tender keeps its bright color and crunch, ensuring you get those lovely nutrients from this green powerhouse. Once it’s done, immediately plunge it into an ice bath or run cold water over it. This stops the cooking process perfectly!
Step 2: Preheat the Oven
While your broccoli cools down, preheat your oven to 375 degrees Fahrenheit. This step is essential because it ensures your dish cooks evenly when it hits the oven later on.
Step 3: Sauté Onions and Garlic
In a medium pot over medium heat, melt the butter before adding in your chopped onions. Sauté them until softened; this releases their natural sweetness. Then stir in minced garlic for just about 30 seconds—this will infuse your sauce with amazing flavor!
Step 4: Create Your Cheesy Base
Now it’s time for that luscious creaminess! Mix in the softened cream cheese until it’s completely melted, then slowly whisk in heavy whipping cream until well blended. This combination creates a rich base that will envelop your broccoli beautifully.
Step 5: Melt in More Cheeses
Stir in both shredded cheddar and colby jack cheeses until melted through. The gooey texture is what we’re aiming for! This step is crucial as it builds that irresistible cheesy flavor we all crave.
Step 6: Combine Everything Together
Pour that heavenly cheese sauce over the blanched broccoli in a large mixing bowl. Gently stir to combine every bit of broccoli with that creamy goodness—it’s going to be delicious!
Step 7: Prepare for Baking
Spread the mixture into a well-greased 9×9 baking dish. This size is perfect for getting those crispy edges while keeping everything moist inside.
Step 8: Create Your Topping
In a separate bowl, combine beef rind crumbs and shredded parmesan cheese. Sprinkle this delightful mixture over your mac and cheese—it adds an extra layer of flavor with just enough crunch!
Step 9: Bake It Up
Now slide your baking dish into that preheated oven and let it bake for about 25 minutes. The top should turn golden brown and bubbly—the perfect sign that dinner is ready!
And there you go—your very own Keto Broccoli Mac and Cheese awaits! Enjoy every creamy bite knowing you’ve created something special that’s also good for you!
Pro Tips for Making Keto Broccoli Mac and Cheese
Creating the perfect Keto Broccoli Mac and Cheese can be even easier with a few helpful tips!
- Use fresh broccoli: Fresh broccoli not only tastes better but also retains more nutrients than frozen. It will give your dish a vibrant color and crunch.
- Soften cream cheese properly: Make sure your cream cheese is at room temperature before mixing it in. This will help it blend smoothly into the cheese sauce without lumps.
- Experiment with cheeses: While cheddar and colby jack are delicious, feel free to mix in other cheeses like Gouda or Monterey Jack for an extra flavor dimension.
- Don’t skip the ice bath: This crucial step stops the cooking process immediately after blanching the broccoli, keeping it bright green and perfectly tender.
- Adjust seasoning to taste: Everyone’s palate is different, so don’t hesitate to add salt, pepper, or even a pinch of cayenne for some heat as you prepare your cheese sauce.
How to Serve Keto Broccoli Mac and Cheese
Serving your Keto Broccoli Mac and Cheese beautifully can enhance both its appeal and enjoyment. Here are some ideas:
Garnishes
- Chopped fresh parsley: A sprinkle of fresh parsley adds a pop of color and freshness that balances the richness of the dish.
- Red pepper flakes: For those who enjoy a bit of heat, a dash of red pepper flakes can elevate this comforting dish.
Side Dishes
- Garlic Butter Shrimp: Quick and flavorful, garlic butter shrimp pairs perfectly with the creamy mac and cheese, adding protein without heaviness.
- Simple Green Salad: A light salad made with mixed greens, cucumbers, and a tangy vinaigrette offers a refreshing contrast to the richness of the mac and cheese.
- Roasted Brussels Sprouts: Their crispy texture and slight bitterness complement the cheesiness, making them an excellent side choice.
- Cauliflower Rice: This low-carb alternative provides a light base for your meal while still allowing you to indulge in the mac and cheese.
Make Ahead and Storage
This Keto Broccoli Mac and Cheese is perfect for meal prep, allowing you to enjoy delicious flavors throughout the week!
Storing Leftovers
- Store any leftovers in an airtight container in the refrigerator.
- The dish can last for 3-4 days when properly stored.
- Reheat individual portions in the microwave or oven until warmed through.
Freezing
- Allow the dish to cool completely before freezing.
- Transfer to a freezer-safe container, leaving some space for expansion.
- Freeze for up to 3 months. Label with the date for easy tracking.
Reheating
- Thaw overnight in the refrigerator if frozen.
- For best results, reheat in the oven at 350°F (175°C) until heated through, about 20-25 minutes.
- Alternatively, use a microwave-safe dish and heat in 1-minute intervals until warm.
FAQs
Can I make Keto Broccoli Mac and Cheese ahead of time?
Absolutely! This recipe is great for meal prep. You can prepare it a day in advance and store it in the fridge until you’re ready to bake.
How do I store leftover Keto Broccoli Mac and Cheese?
Store leftovers in an airtight container in the refrigerator for up to 3-4 days. For longer storage, consider freezing it.
Is this Keto Broccoli Mac and Cheese gluten-free?
Yes! This recipe is naturally gluten-free as it uses broccoli instead of traditional pasta, making it a perfect option for those on a keto diet.
Final Thoughts
I hope you find joy in making this Keto Broccoli Mac and Cheese! It’s not just a healthy alternative; it’s also comfort food that brings warmth to your table. Enjoy every cheesy bite, and don’t hesitate to share your experience with friends and family. Happy cooking!